To create a treatment, first you go to the patient dashboard for the Patient you would like to add a treatment for, and then open the menu in the upper right of the screen.

From here you select "Add Treatment", which will bring up the Add Treatment dialog.
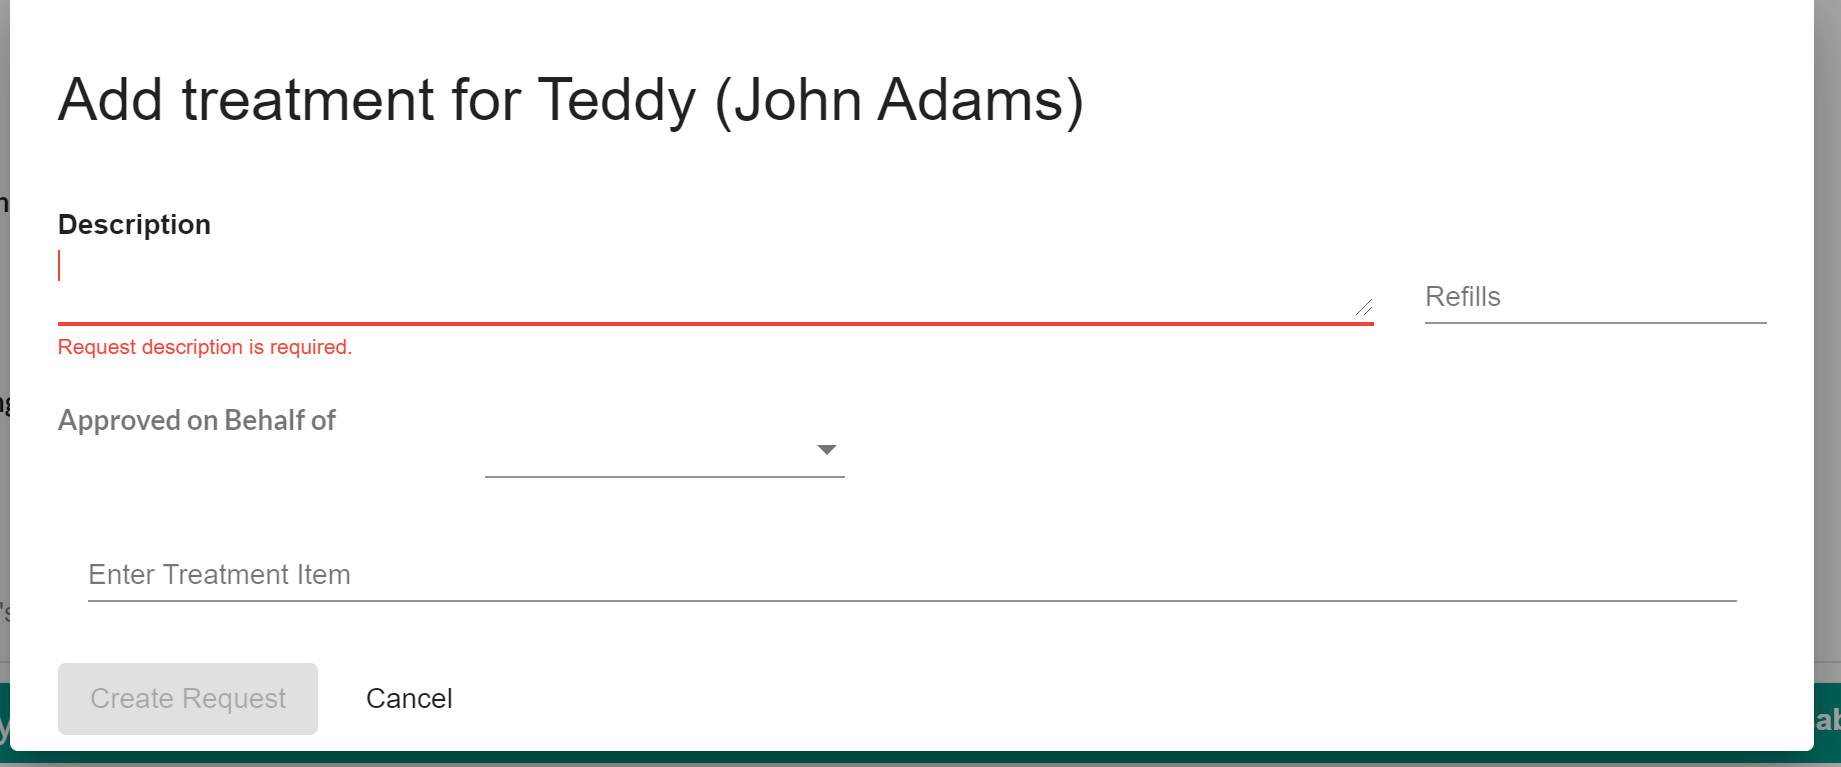
Here you must add the description and are able to add refills and Approved on Behalf of (the last two are optional and the last one might not be turned on for your clinic).
After that you start typing in the "Enter Treatment Item" field which will auto complete from your inventory.
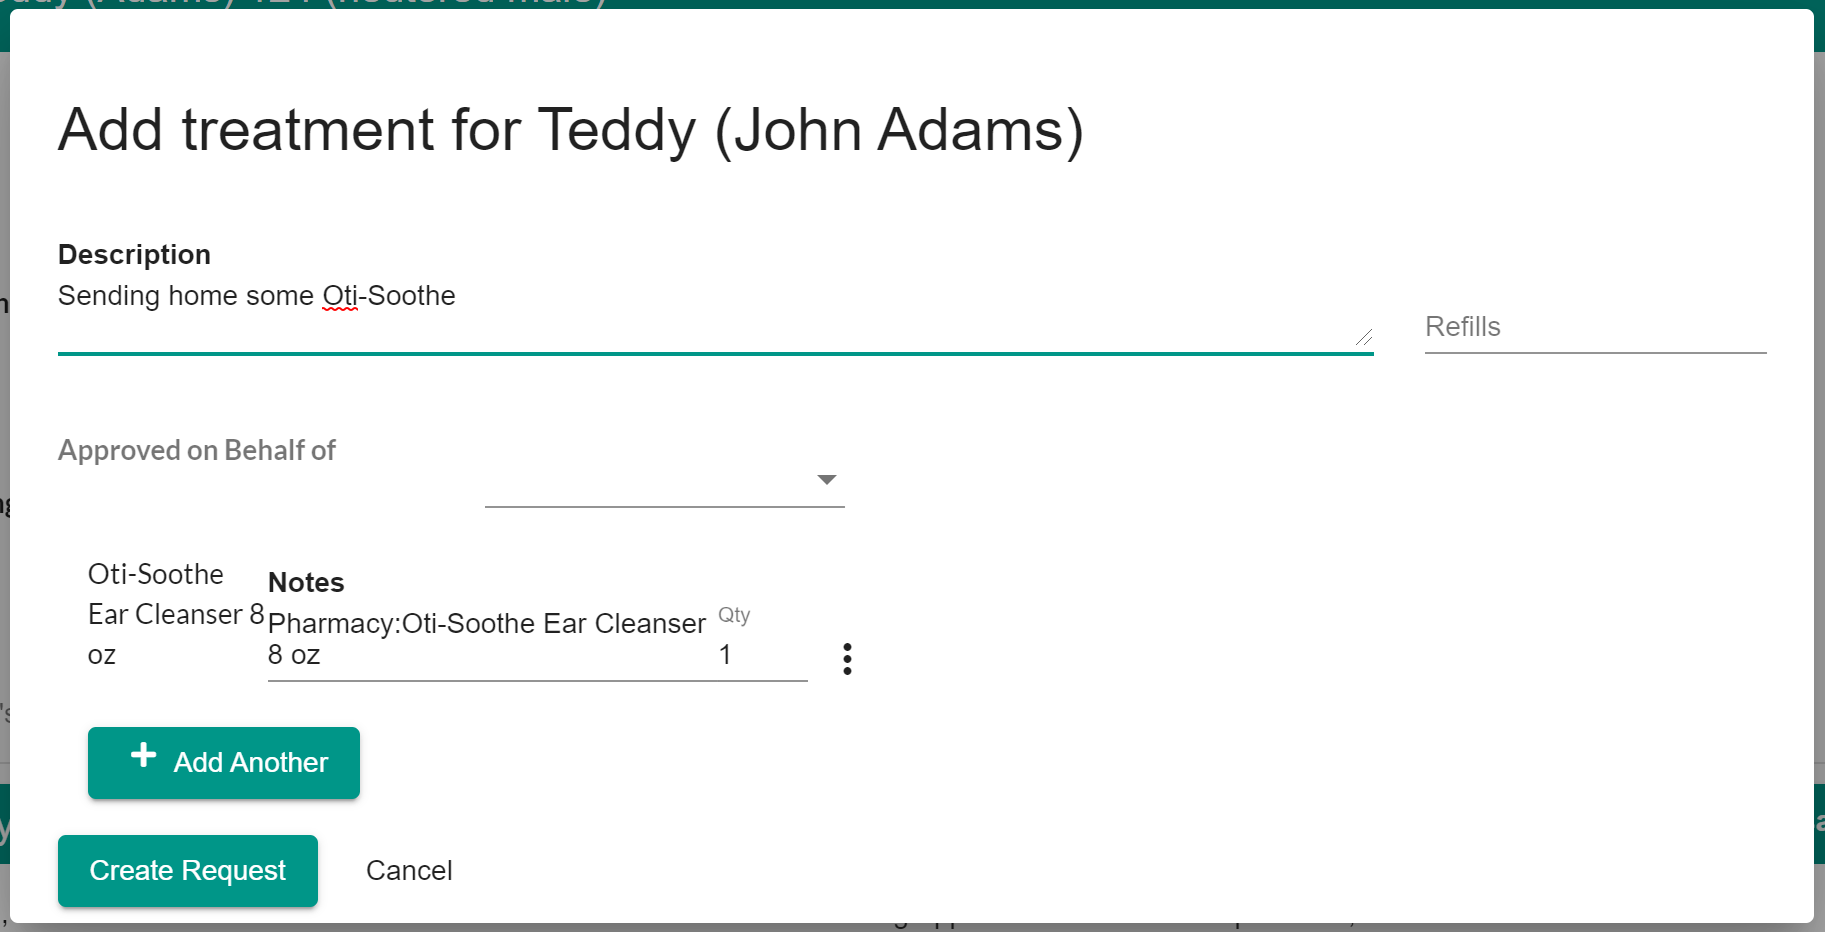
If you need to add another item, just click "Add Another" and repeat.
Once you have everything in, just click "Create Request"
This will add a task for the treatment as well as a history item for the treatment as well.
To process the item, you can either access the task from the task panel or open the task in the dashboard.
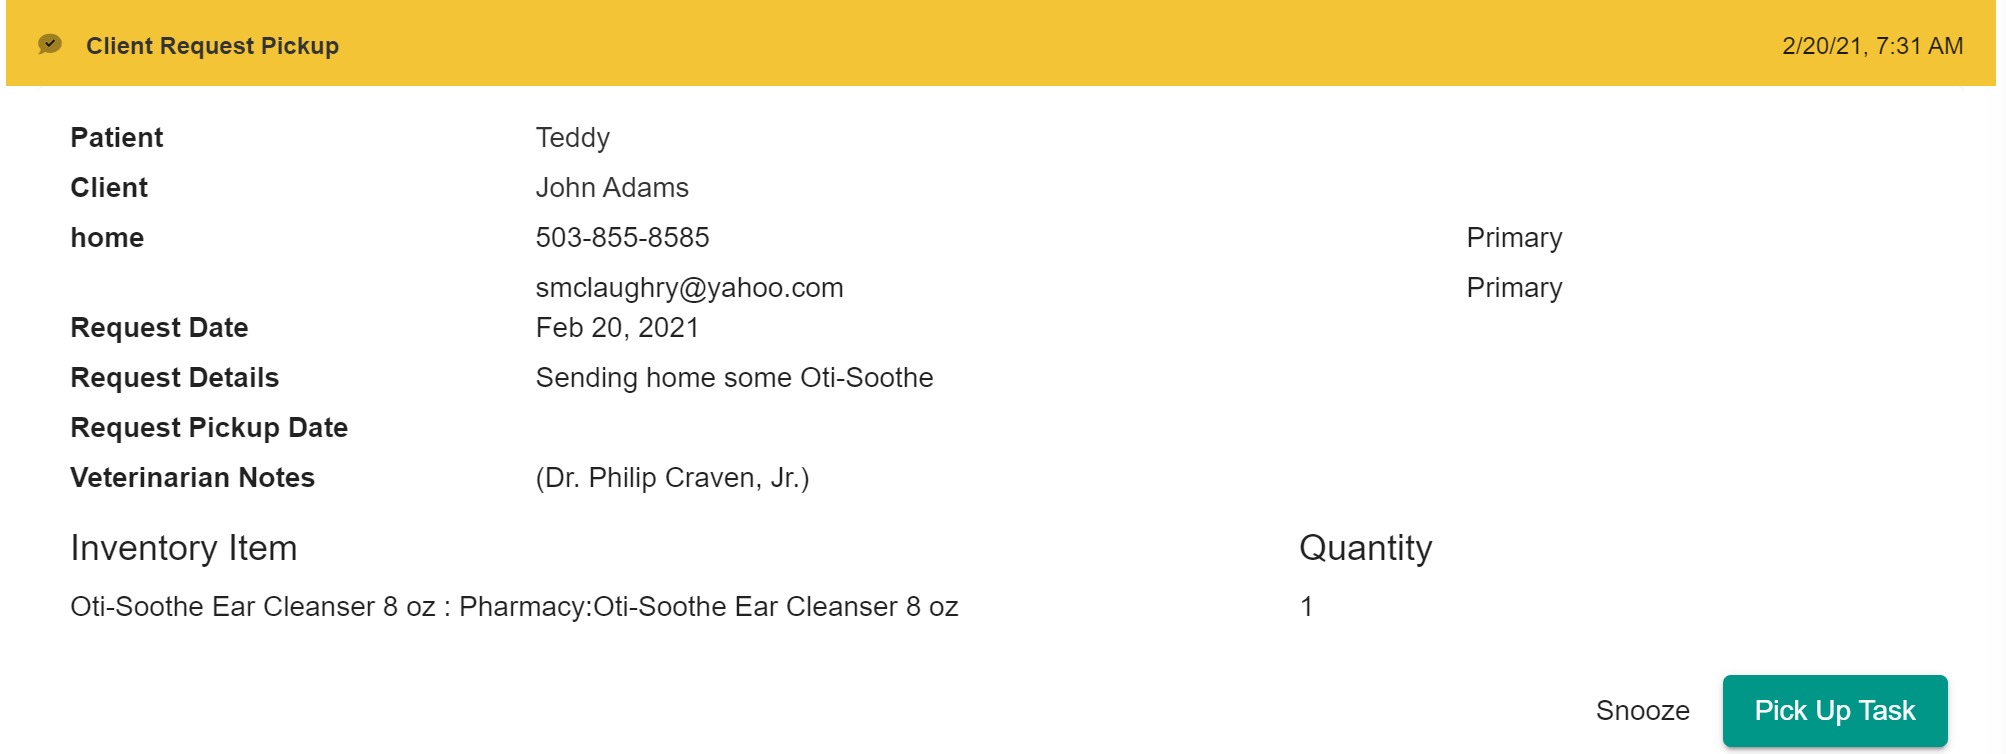
Above we opened the task in the dashboard. Now we select "Pick Up Task" then add any appropriate notes and click on "Completed" to mark that the treatment has been made ready. Next you can find the item in the patient history:

To access the invoice, you click on the item which will bring up the details for the item.
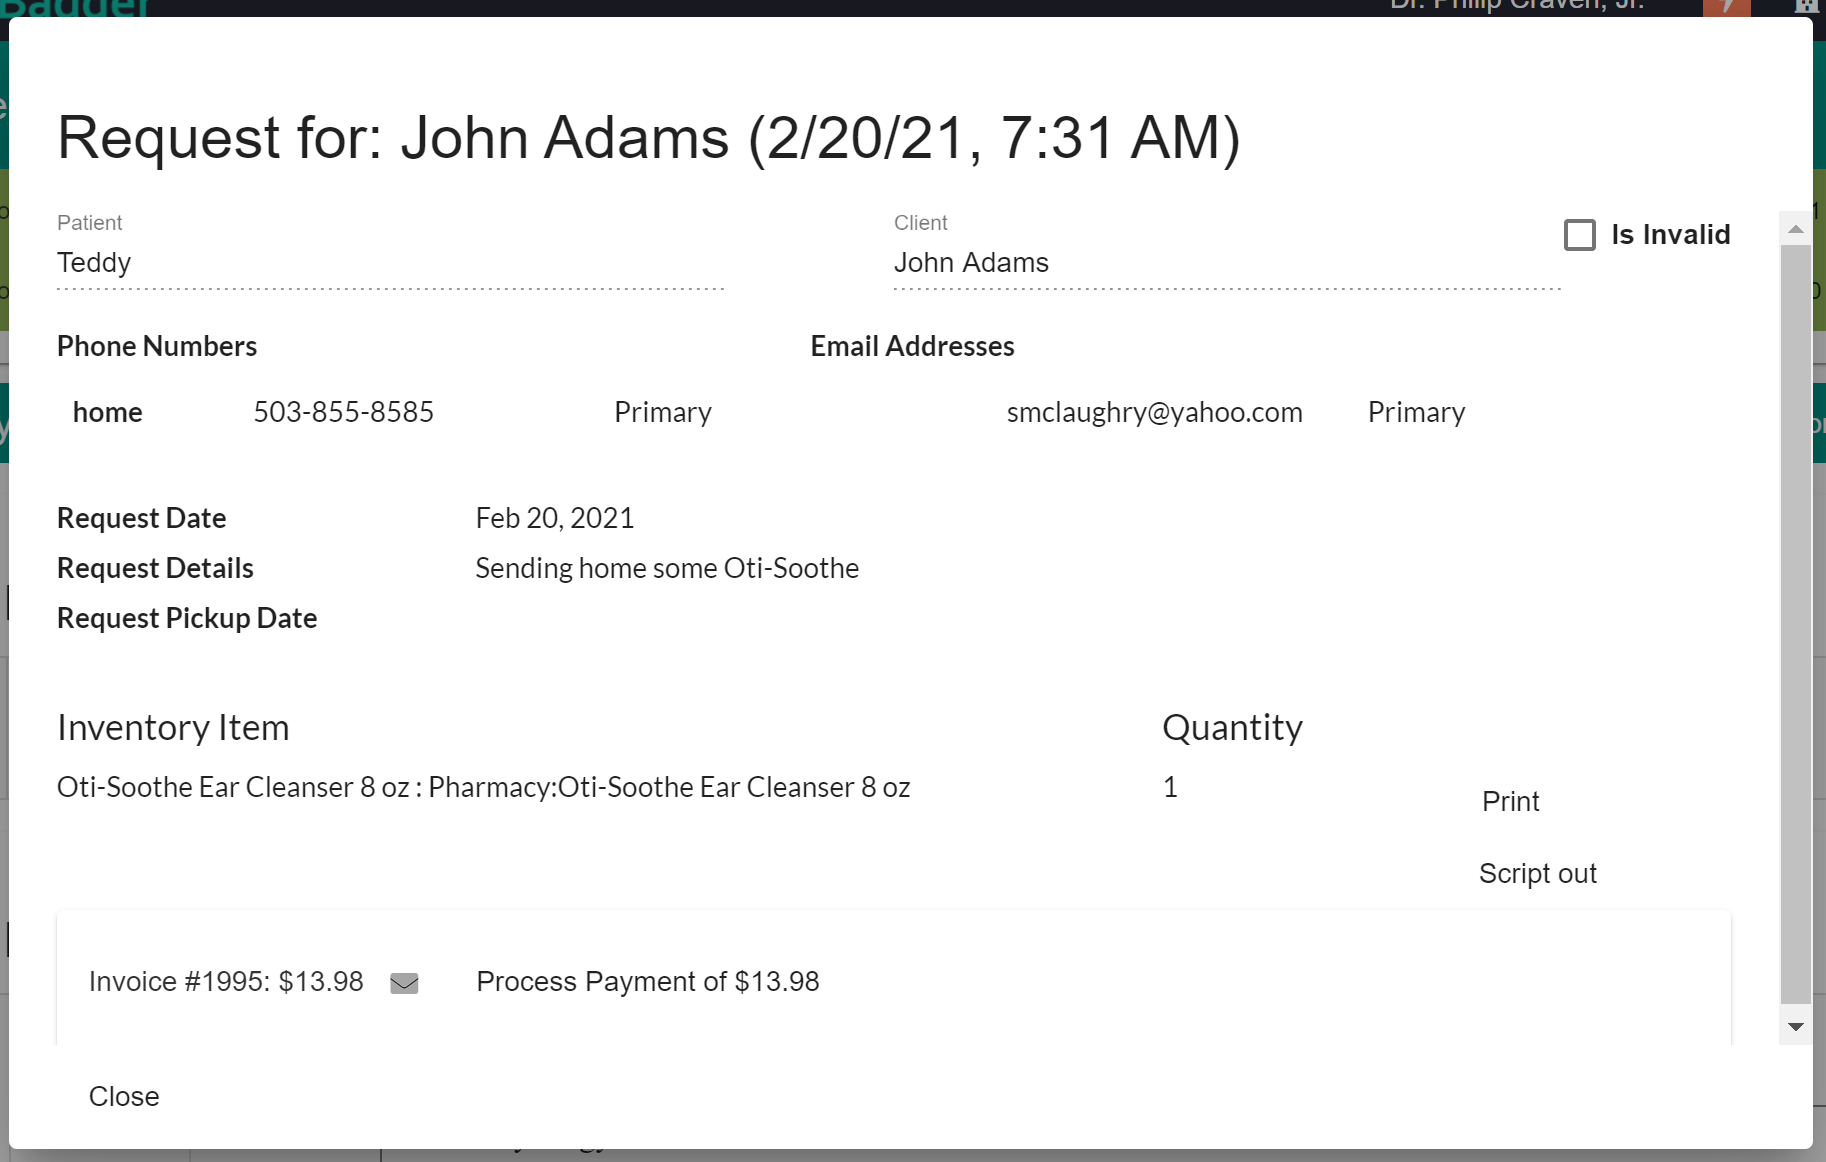
Here you can click on the invoice to open it in QuickBooks or click on the envelope to email the invoice. You are also able to process the payment by clicking on "Process Payment"
